
FitKit Guide
Once you place your order for your Ultimate Ears, an at-home FitKit will be sent to you. You will use this FitKit to capture your ear measurements from the comfort of your home. In addition to your FitKit, you will also need to download the UE FitKit App (iOS/Android). The app will walk you through the entire fitting process with step-by-step instructions.
What's In The Box
Your FitKit will ship with the following:
1x Curing Device
1x Pack Left Tips (Small/Large)
1x Pack Right Tips (Small/Large)
1x USB Wall Plug
1x Pre-Paid Return Shipping Label
Picking The Right Size
Once you have received your FitKit, it's time to start the molding process. To achieve a great fit, you will want to be sure you choose the correct tip size for your ears. Your FitKit ships with both small and large molding tips which fit 95% of ears.

When selecting your tip size, we recommend trying both sizes in each ear to find the best fit. Ears are more unique than fingerprints. It is normal for you to need a different size from left to right. We also recommend pulling your hair back while going through the selection process to prevent any interference.
***If you find that both tips are too large for your ears, don’t fret. You can reach out to our support team. We would love to assist you on your journey to a perfect fit. We have created extra small tips for this exact reason.
How do you know if you picked the right size?
The correctly sized tip for your ear should feel snug and secure in the ear. There should be gentle pressure throughout your entire ear as well as in your ear canal. It may feel odd, but don't worry. That's normal. What you don't want is to feel excessive or painful pressure. You also don't want to feel like your tips will fall out of your ear.
Too large: If the wing doesn't fit under the arch in your ear, or the wing/canal is applying excessive pressure on your ear, try the next size down.
Too small: If you hear outside noise, feel air leaking in, or the tip doesn't feel secure in your ear, try the next size up
Once you identify the right size for each ear, the app will require pictures of the tips in your ears so our detailers can examine the fit. This will help them make adjustments to the final product to ensure a better fit.
Putting In Your Molding Tips
To properly place molding tips in your ears, begin by holding the tip between your thumb and pointer finger, making sure the lower tip is resting on your thumb.

Rotate the tip so that the top of the upper tip is facing towards the front of your head, and carefully insert the lower tip into your ear. Gently wiggling the tip as you place the lower tip in your canal will help it go in all the way.
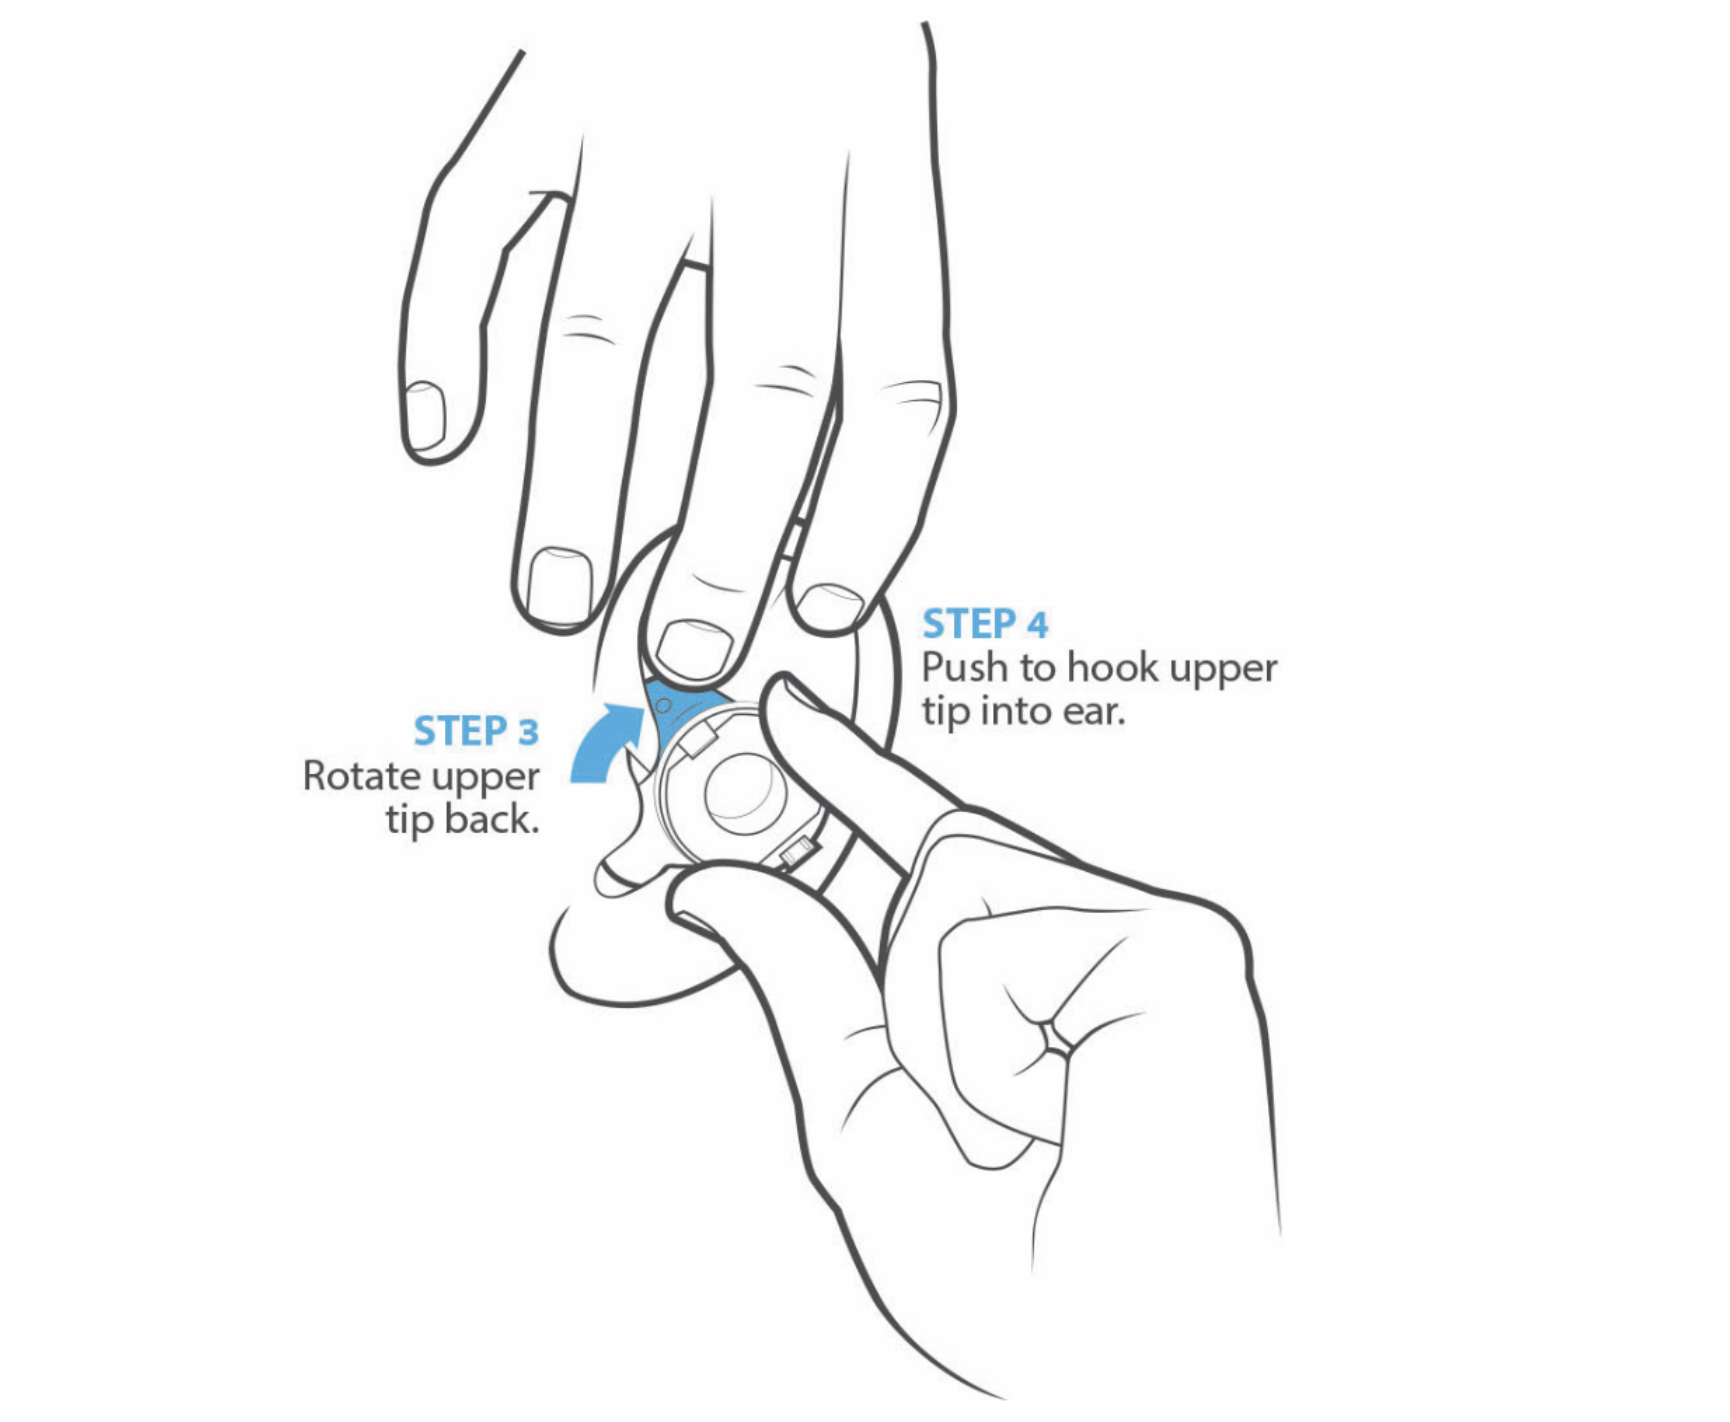
Make sure that the lower tip goes into your canal. It can sometimes get caught on the skin right outside of the canal, which can leave you with a bad fit and seal.
Now that you have the lower tip in, use your free hand to gently pull up on the top of your ear, as you rotate the tip towards the back of your head. Once you have rotated the tip into place, gently push down on the upper tip, until it is securely tucked under the cymba.
The fin is a crucial part of what keeps your earphones from falling out of your ears. If the fin is not properly tucked, your tips may be rejected. If your tips are rejected, our team will send you a new FitKit so that you can try the process again.
Connecting Tips
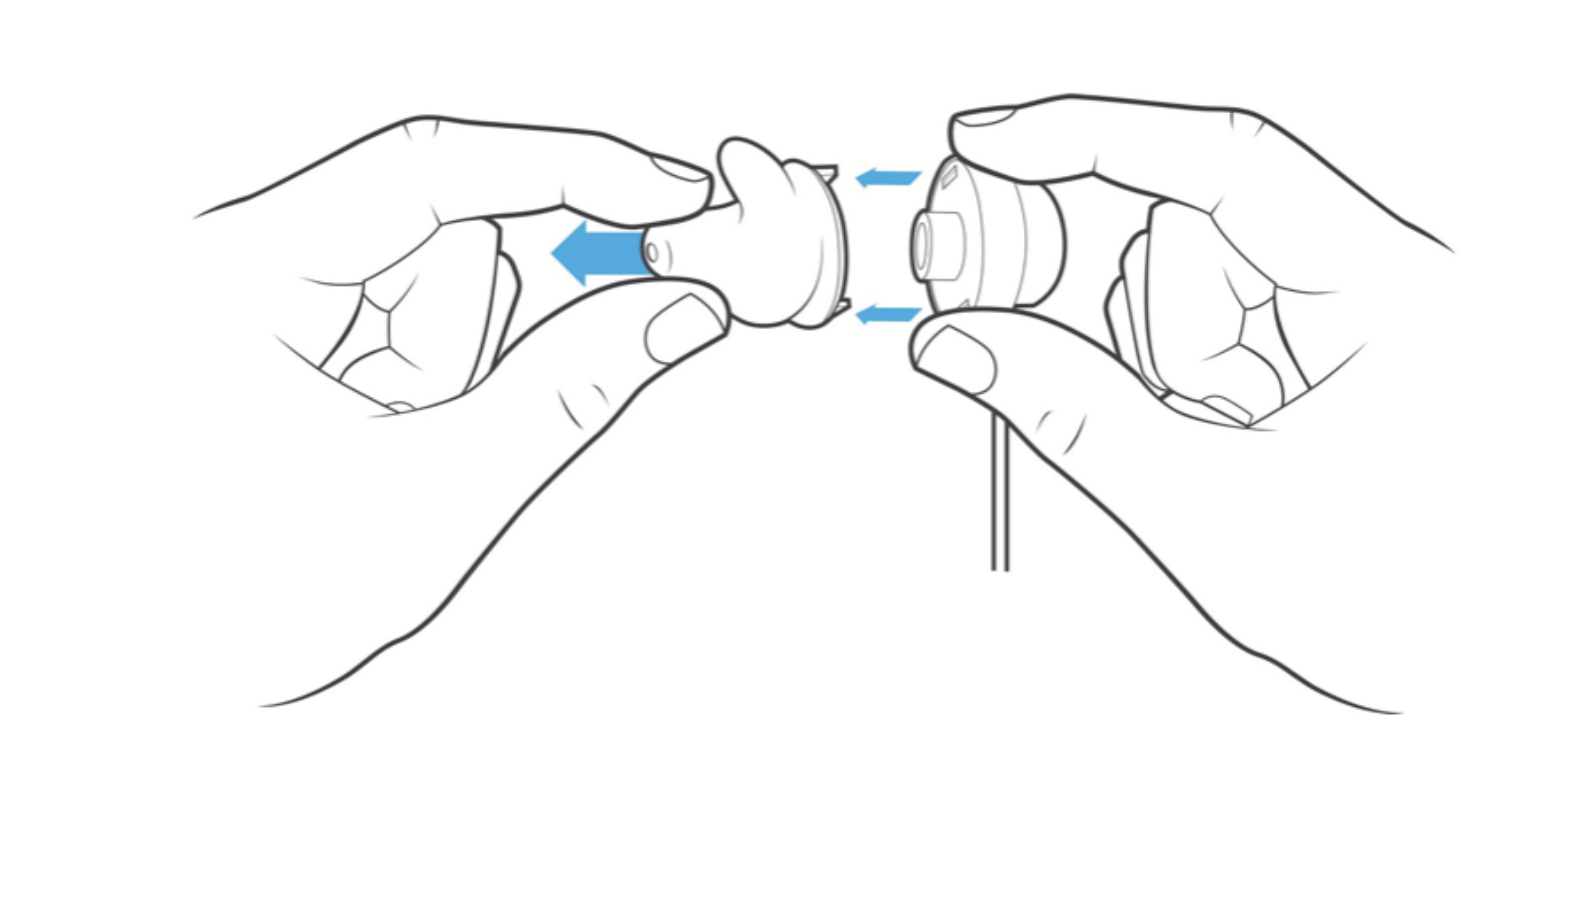
Check the back of the molding tips and the front of the fitting device for the colors on each side. Red (right) goes with red, and blue (left) goes with blue.
Simply click the prongs of the molding tips into the fitting device. Don’t worry about connecting them upside down, they won't clip on that way.
To disconnect the tips, simply hold the canal portion of the molding tip in one hand and the base of that side of the fitting device in the other hand and pull apart. Note: Be gentle if removing un-molded tips as the molding gel is still soft.
Curing Your Molding Tips
Now that you have selected your tips and connected them to the curing device, you are ready to mold your tips.
Place the molding tips in your ears, with the curing device attached. The weight of the curing device may start to pull your tips out of your ear, but this is totally normal. Once you have the tips in your ears, hold them in place with your fingers using gentle pressure. You want to apply enough pressure to cause the gel in the tips to conform to the shape of your ear during molding, but be careful not to apply to much pressure.
Applying too much pressure during the molding process can cause your tips to fold in on themselves, and become deformed. A deformed tip will not provide an accurate ear measurement and will be rejected by our detailers.
Not sure your molds came out right? Our support team is standing by to help you. Hold onto your FitKit and email support a picture of your tips. They will review them and let you know whether you need to try it again.
Can I remold the tips?
Your tips should mold completely during the warming process and will not remold once they’ve been hardened. Going through the customization process a second time will neither damage nor change your already molded tips.